How to solve the "Critical Process Died" error in Windows 11

Users may encounter the "Critical Process Died" error in Windows 11, leading to system crashes or instability. This article outlines several effective methods to help you quickly fix the issue and restore normal system operation.
What is "Critical Process Died"
"Critical Process Died" is an error in the Windows operating system that usually indicates that an important process or service has unexpectedly terminated. This can be caused by various reasons, including software conflicts, corrupted system files, or driver issues.
1. Update Drivers
Updating drivers can resolve compatibility issues and improve system stability, making it an essential step in fixing the "Critical Process Died" error. It's recommended to use Driver Sentry for automatic driver detection and updates, which saves time and helps avoid downloading or installing incorrect drivers.
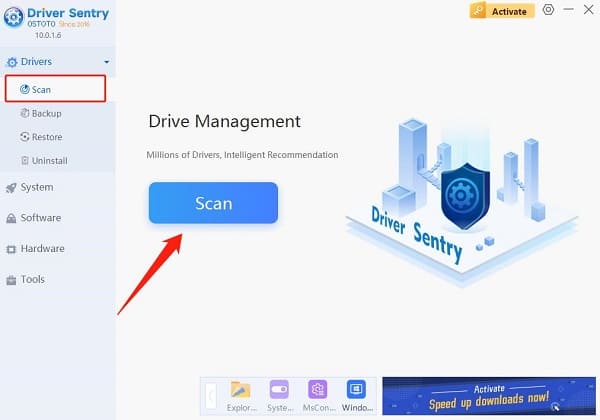
Download the latest version of Driver Sentry, install it, and open the software. Click "Scan".

After scanning, the software will display the drivers that need to be installed or updated. Find the necessary drivers in the list and click "Update".
Once the update is complete, restart your computer to ensure the updated drivers work properly.
2. Run System File Checker
Press "Win + X" and select "Windows Terminal (Admin)" or "Command Prompt (Admin)".
In the command prompt window, type "sfc /scannow" and press Enter.

This command will begin scanning all protected system files. If any corrupted files are found, SFC will automatically attempt to repair them. This process may take a few minutes, so please wait patiently.
After the scan is complete, the system will show the results. If damaged files were found and repaired, you will see a confirmation message.
Restart your computer after the repair and check if the issue is resolved.
3. Check for Windows Updates
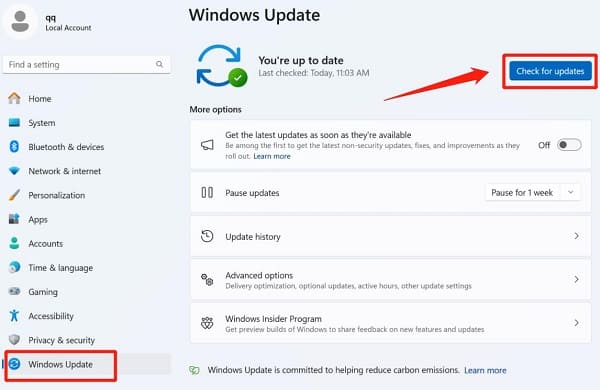
Press "Win + I" to open the Settings window and click "Update & Security".
Select "Windows Update" and click the "Check for updates" button. The system will search for the latest Windows updates and automatically download and install them.

If updates are available, click "Install now". Wait for the updates to download and install.
After the installation, you may be prompted to restart your computer. After restarting, ensure that all updates have been correctly installed.
4. Disable Fast Startup
Press "Win + S" to open the search box, type "Control Panel", and then click to open it.
In the Control Panel, select "Power Options".
In the left menu, click "Choose what the power buttons do".
Click the "Change settings that are currently unavailable" link at the top of the page.
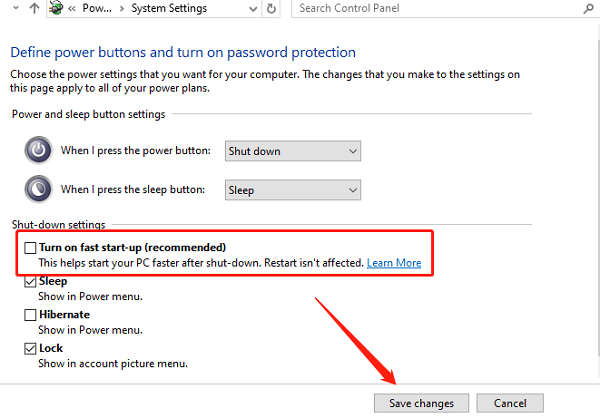
Under "Shutdown settings", uncheck the "Turn on fast start-up (recommended)" option, then click "Save changes".

After making the changes, restart your computer to apply the settings.
5. Scan for Malware
Press "Win + I", go to "Settings", and select "Privacy & Security".
Click "Windows Security" and then select "Virus & Threat Protection".
Under "Current threats", click "Scan options", choose "Full scan", and click "Scan now".
The system will begin a comprehensive scan of all files and applications. If any threats are found, the system will automatically handle them.
If malware or viruses are detected, follow the on-screen instructions to remove or quarantine them.
After scanning and removing threats, restart your computer and check if the issue is resolved.
6. Reset Windows 11
Press "Win + I" to open Settings, then click "System".
On the "System" page, select "Recovery" and click "Reset this PC" under the "Reset" section.
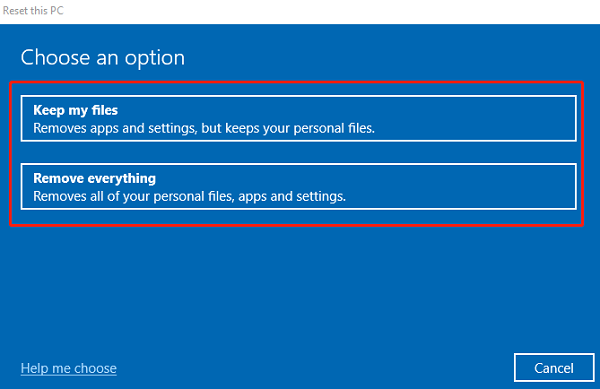
You can choose either "Keep my files" or "Remove everything".
"Keep my files" will reinstall Windows while preserving personal files but will remove all apps and settings.
"Remove everything" will fully reset the system, removing all files, apps, and settings.

The system will offer two reset options: "Cloud download" and "Local reinstall". Selecting "Cloud download" will get the latest version of Windows from Microsoft's servers.
Follow the on-screen instructions to complete the reset. The system will automatically begin the reset process.
After the reset is complete, the system will restart and restore to its default settings.
Following these steps should help resolve the "Critical Process Died" issue. Keep your system updated and perform regular maintenance to reduce the chance of recurrence. If the problem continues, seek professional technical support.
See also:
8 Ways to Fix Network Latency Issues
How to Fix Apex Legends Crashing on PC